Teonanacatl.org

Aqui discutimos micologia amadora e enteogenia.

Cadastre-se para virar um membro da comunidade! Após seu cadastro, você poderá participar deste site adicionando seus próprios tópicos e postagens.

  • Por favor, leia com atenção as Regras e o Termo de Responsabilidade do Fórum. Ambos lhe ajudarão a entender o que esperamos em termos de conduta no Fórum e também o posicionamento legal do mesmo.

Ultrassônico + Pet 2L !!??

Premonisom

Artífice esporulante
Contribuidor
24/11/2005
613
80
Estava eu com tempo vago, e assim comecei a pesquisar no mycotopia, mesmo sem saber nada de inglêr, fico vendo só as fotos hehe

foi aí que encontrei uma técnica muito loca de um amigo de lá

se resume pelo que entendi visualmente, a um tipo de etapas para uma umidificação com menos partículas de água, assim evitando que molhe o desejado

usa-se também pedra porosa com um pote por fora do terrário, nunca vi técnica parecida aqui no forúm

alguem pode nos traduzir a Tek??, é permintido que se faça, sem a autorização do autor ??

segue o link!!

https://mycotopia.net/showthread.php?t=11249
 
alguem pode nos traduzir a Tek??
O CM não tem (tinha, ou era pra ter) um time de tradutores?

é permintido que se faça, sem a autorização do autor ??

Permitido é, só não é bonito. (muito menos ético) Estou sabendo que tempos atrás rolou um intercambio com a gringaiada, creio que alguns usuários daqui ainda mantém contato com os mesmos e poderiam descolar a "autorização"

Beijinhos;.
 
O CM não tem (tinha, ou era pra ter) um time de tradutores?


Permitido é, só não é bonito. (muito menos ético) Estou sabendo que tempos atrás rolou um intercambio com a gringaiada, creio que alguns usuários daqui ainda mantém contato com os mesmos e poderiam descolar a "autorização"

Beijinhos;.

é verdade manu!!

quase certeza que o louco não se importaria ;)

vamos ver se o Boca pode fazer essa de pedir a autorização, acho que ele é membro do forúm!!

e já aproveita e faz a tradução!!! hahaha


Eticismo sempre!!!


Boca,sim ou não??
 
é verdade manu!!

quase certeza que o louco não se importaria ;)

vamos ver se o Boca pode fazer essa de pedir a autorização, acho que ele é membro do forúm!!

e já aproveita e faz a tradução!!! hahaha


Eticismo sempre!!!


Boca,sim ou não??
O acodo que temos com o pessoal é de livre copia DESDE QUE citada a fonte.
É "educado" pedir autorizaçao pro criador do topico, incluindo link pro topico destino (esse aqui).
Mas de acordo com o hippie3 temostotal liberdade pra copia.
 
O acodo que temos com o pessoal é de livre copia DESDE QUE citada a fonte.
É "educado" pedir autorizaçao pro criador do topico, incluindo link pro topico destino (esse aqui).
Mas de acordo com o hippie3 temostotal liberdade pra copia.

Certo :D

e a tradução??

vai contribuir com os desprovidos do idioma??


valeu!!
 
Para ficar mais fácil segue o texto, já que muitos não possuem acesso ao link

não consegui montar com as fotos em baixo como deve ser, se alguem souber e quiser arrumar, ficaria grato em nome de todos

Quem poder traduzir, fique a vontade..;)


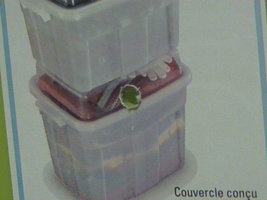
OK well here goes....(first off all the tubing i used was 7/16 inch outer diameter, 5/16 inch inner diameter and the grommets were all 3/8 inch inner diameter grommets i started off with a tub like this one(disregard the tyvek and pretend it is still a whole tub)

Foto 1

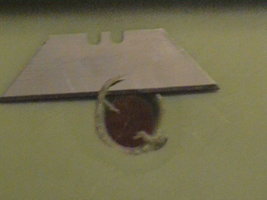
a hole on one of the short sides of the tub like this

foto 2

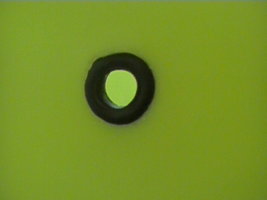
grommet in for the tube that is going to come from the humidifier like so

foto 3

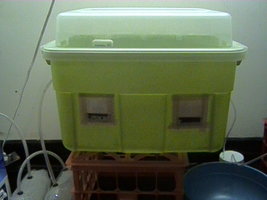
Ok now that I have that done I cut out 4 2" holes 2 on each of the long sides of the tub and covered them with a double layer

foto 4

of tyvek like this
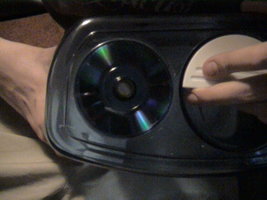
Alright now here is where it gets personal , my bro came up with the idea to take a mini cd and put a grommet in it (the same size as all the other ones for this whole project) and silicone it on to the top of the humidifier where the original mist output was at,all you have to do is pop off the original mist output.This is what it looked

foto 5

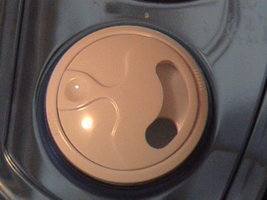
like to begin with
and now this is what it looks like

foto 6

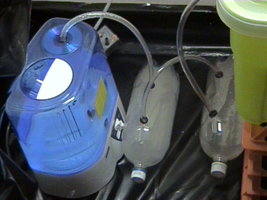
Ok then i took 2 2 liter soda bottles and put two of the affore mentioned grommets in each of them (one for the tube coming into the bottle and one for the tube coming out of the bottle, this is what it looks like now that i have the humidifier and bottles with grommets set up

foto 7

and then I just inserted the last piece of tubing coming from the last bottle into the grommet in the fruiting chamber.Next what i did was set up the air pump with polyfill filters and the bubble stone and to do this I took a plastic mason jar lid and drilled 2 holes in the lid the same size as the aquarium hose one in the middle and one near the edge,then i took the tube from the air pump and hooked it into the polyfill filter(called a check valve) like this

foto 8

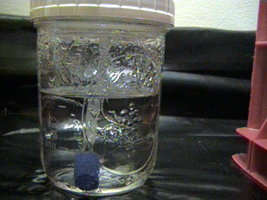
and then I took another piece of tubing from the check valve and ran it into the center hole in the plastic lid of the mason jar and then once the tube was in the lid I connected the bubble stone(note once you connect the bubble stone if you try and take the tube off of it it will break so you need to split the tube with a razor if wanting to remove it) it

foto 9

looks like this
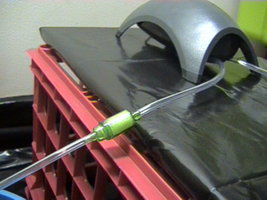
Then after that was done I drilled a same size hole as the airline tubing in the opposite side of the side I put the humidifier tube and grommet into like this

foto 10

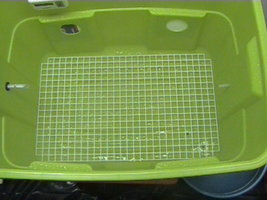
and ran a piece of tube from the hole in the jar near the edge of the jar lid into the tub.I also got some eggcrate(the stuff they use in flouroscent light fixtures) and cut it to fit the bottom of the tub (it is a PITA to cut to get it to fit just right by the way) to keep the cakes off of the bottom of the tub like this

foto 11

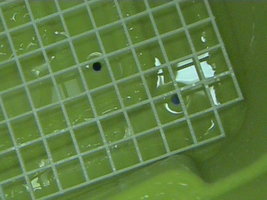
Also the way these tubs are made I had to drill 2 holes into the bottom of the tub in 2 different places to make sure that the water that gets accumulated in the tub can drip out in to a big bowl that i use to catch the water....here are the two holes that i drilled..view from the inside of the tub

foto 12

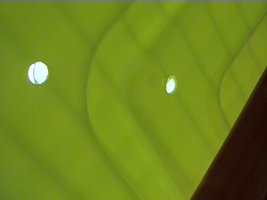
(note you can kinda see the ridge that is in the way and that little ridge type deal is why i had to drill 2 holes instead of one) and here is a bottom view

foto 13

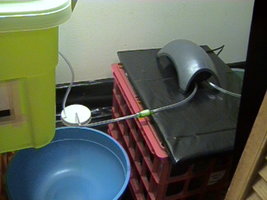
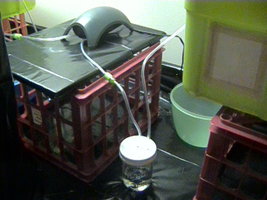
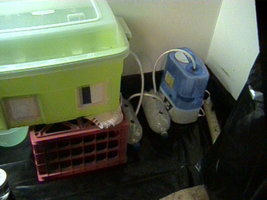
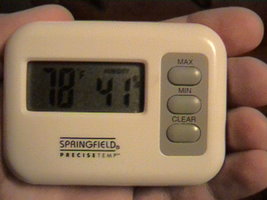
(you can see the ridge a little better from the bottom) and i have my tubs on these things called yaffa blocks to keep them off of the ground and also so i can put a rag on the other side and opposite corner of the drain holes so the water can all run to the drain holes and drain out...Ok and now for the final product and what it looks like in my closet(the pics are in order from the left side of my closet to the right side)

foto 14
foto 15
foto 16
foto 17
foto 18

FONTE: MYCOTOPIA.NET
Ultra.JPGUltra2.JPGUltra3.JPGUltra5.JPGUltra6.JPGultra7.JPGultra 8.JPGultra9.JPGultra10.JPGultra11.JPGultra12.JPGultra13.JPGultra15.JPGultra16.JPGultra17.JPGultra18.JPG
 
NO AGUARDO DA TRADUÇÃO, PARA TIRAR MELHORES CONCLUSÕES.

Porém:

O sistema, usando 2 ou 3 garrafas pet, com água até uma altura, serve para aumentar a umidade do ar injetado para dentro do terrário. Ele funciona bem, elevando o nível de umidade, ok? aí que está algo que eu condeno: digo que funciona bem, se utilizado uma bomba de ar de aquário, também conheçido por oxigenador. O ar entraria dentro de uma garrafa totalmente vedada, borbulharia dentro da água, que estaria no nivel da metade da garrafa. Esse ar resultante do borbulho na primeira garrafa, está enriquecido em umidade agora.

Esse mesmo ar, vai para outra garrafa, no mesmo sistema que a primeira: entra por uma mangueira, e novamente borbulha na água da 2º garrafa. Como o nível de liquido nas garrafas não é total, faz-se um furo no espaço tomado pelo ar, onde será a saída da mangueira, com destino ao próximo pet, mais uma vez bolbulhando.

Essas etapas de borbulho, em recepiente totalmente lacrado, vai aos poucos saturando com partículas de água o ar injetado para dentro do terrário. Em dias muito frios é menos eficiente, porém eu diria que é um belo sistema.

Aí vem uma observação: nota-se que foi utilizado o ar saído de um umidificador. Aí já não concordo com todo sistema. O ar do umidificador, se for ultrassônico (não eleva a temperatura), já é pronto para ser injetado diretamente no terrário, desde que controlado a frequência e tempo de funcionamento. Por isso, que, eu utilizaria tal parafernália se não tivesse o umidificador.

De posse de umidificador, eu eliminaria todo o resto, a não ser que a tradução revele algo que não pude observar nas fotos. Essa é minha ópinião.

paz e luz
 
ola, sou novo por aqui porem o sistema mencionado com as duas garrafas pet somente servem como filtro de ar ou seja serve pra limpar o ar forcado para dentro do terrario, mas nao para humidecer, pode ate haver um aumento da humidade porem e muito pequena por isso do humidificador depois das garrafas ok

Abracos:

Excelente observação rossit !!!
 
Que engenhoca mais interessante......só falta a tradu.....mesmo, nossa estou vendo usuarios que nunca havia visto antes............ isso é legal.......very cool!!!!!!!!

Paz e luz!!!!!!!!!!!
 
Ok, la vamos nos.. (primeiramente, todas mangueiras usadas possuem diametro externo de 1,1cm e interno de 0,8 cm e os ilhos eram todos de 1 cm de diametro interno), comecei com uma caixa como essa (Esquecam as parafernalhas e finjam que ainda eh uma caixa inteira)

Foto 1

um buraco em um dos lados menores da caixa assim:

foto 2

ilhos ali para o cano que vai vir do humidificador assim:

foto 3

Ok, apos isso eu corto 4 buracos de 5 cm, dois em cada um dos lados grandes da caixa e cubro eles com um "escapamento??" (nao entendi mto bem.. eh algum produto deles q a principio abre e fecha.. hehe)

foto 4

Ok, agora vira pessoal, meu amigo veio com a ideia de usar um mini cd com um ilhos (do mesmo tamanho dos outros) e colar com silicone no lugar da saida original do umidificador, por onde sai a brisa, tudo que voce tem que fazer eh tirar a saida original, assim que deve ficar:

foto 5

Assim que deve ficar:

foto 6

Ok, depois pegue 2 garrafas de 2 litros e coloque 2 ilhos em cada uma, uma para a mangueirinha que entra e outro para a que sai) assim que deve ficar:

foto 7

E depois eu apenas conectei o ultimo pedaco de mangueira que vinha da ultima mangueira no ilhos do terrario. Depois o que eu fiz foi conectar o filtro polyfill na bombinha de ar e a pedra porosa para usar isso usei um vidro (pode ser de pepino) onde fiz dois buracos na tampa do mesmo tamanho da mangueirinha do aquario, entao levei a mangueirinha ateh o filtro. assim:

foto 8

E depois puxei outro pedaco de mangueira do filtro e coloquei no buraco central do pote acima mencionado e apos o tubo entrar no pote conectei-o a pedra porosa.

foto 9

Entao depois disso, eu fiz um furo do mesmo tamanho das mangueirinhas de aquario no lado oposto aos furos usados para o umidificador na caixa e utilizando ilhos conectei o sistema assim:

foto 10

(amanha termino viu.. preciso dormir.. hehe)

and ran a piece of tube from the hole in the jar near the edge of the jar lid into the tub.I also got some eggcrate(the stuff they use in flouroscent light fixtures) and cut it to fit the bottom of the tub (it is a PITA to cut to get it to fit just right by the way) to keep the cakes off of the bottom of the tub like this

foto 11

Also the way these tubs are made I had to drill 2 holes into the bottom of the tub in 2 different places to make sure that the water that gets accumulated in the tub can drip out in to a big bowl that i use to catch the water....here are the two holes that i drilled..view from the inside of the tub

foto 12

(note you can kinda see the ridge that is in the way and that little ridge type deal is why i had to drill 2 holes instead of one) and here is a bottom view

foto 13

(you can see the ridge a little better from the bottom) and i have my tubs on these things called yaffa blocks to keep them off of the ground and also so i can put a rag on the other side and opposite corner of the drain holes so the water can all run to the drain holes and drain out...Ok and now for the final product and what it looks like in my closet(the pics are in order from the left side of my closet to the right side)
 
Aeeeee!!!
Grande irmão!
Obrigado pela tradução!!!

Abraço
 
Back
Top